> For the complete documentation index, see [llms.txt](https://nftikets.gitbook.io/untitled/llms.txt). Markdown versions of documentation pages are available by appending `.md` to page URLs; this page is available as [Markdown](https://nftikets.gitbook.io/untitled/user-guide/how-to-sign-up-on-nftikets.md).
# How to sign up on Nftikets
As an event organiser or guest, one of the things that may be topmost on your mind is how tickets to an event can be secure and accessed easily and speedily.
Nftikets was built with this in mind.
Imagine that you could create valuable tickets to an event which can not be duplicated or sold without your authorization and these tickets could be accessed from anywhere in the world.
Unlike other platforms, Nftikets can be integrated to your website so that your guest can access tickets directly for the event's site without having to visit the ticketing platform.
Nftikets custom design enables swift ticket verification and provides multiple payment options, including online, offline, crypto and multiple currency payments.
You have the option to mint your tickets as NFTs so as to gain more control over secondary sales and eliminate the possibility of your tickets to be counterfeited or scalped.
Here's how to get started on Nftikets:
#### Requirement
A valid, active email address.
follow these five (5) quick steps:
#### Step 1: Login
* Go to [https://nftikets.io/](http://nftikets.io/)
* Click on Login
nftikets.io
#### Step 2: Connect Email
* Select 'Connect email'
* Enter your email address and click on **Send**.
Note: Provide a valid email address that you have access to.
#### Step 3: Email verification
* A one-time password (OTP) would be sent to the email address you provided.
* Enter the code for automatic verification.
#### Step 4: Enter your details
* You'll be redirected to a form where you'll be required to enter your information.
* Fill the provided fields with your correct information and click on continue.
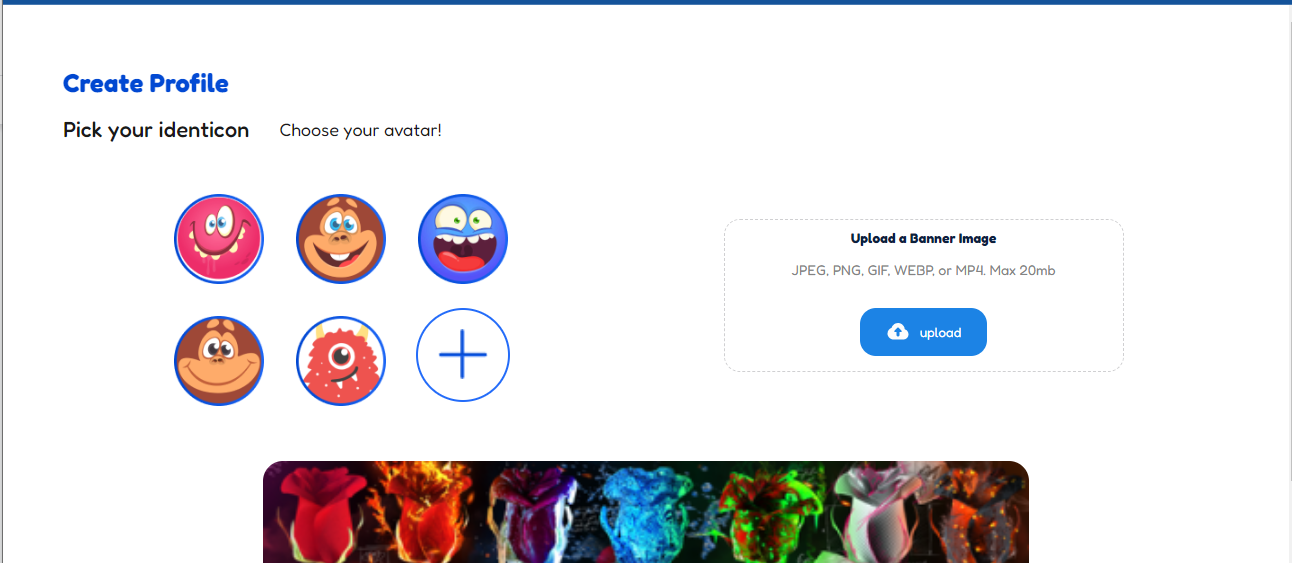
#### Step 5: Create profile
* You would be redirected to the Create profile page
identicon
* On this page, you can choose an identicon from the available options or add a photo of your choice from your device by clicking on the ' + ' icon.
* Upload a banner image to make your profile fun and catchy.
P/S: Image sizes should not exceed 20 megabytes
Click on **Done** and you're done indeed!
---
# Agent Instructions
This documentation is published with GitBook. GitBook is the documentation platform designed so that both humans and AI agents can read, navigate, and reason over technical content effectively. Learn more at gitbook.com.
## Querying This Documentation
If you need additional information that is not directly available in this page, you can query the documentation dynamically by asking a question.
Perform an HTTP GET request on the current page URL with the `ask` query parameter:
```
GET https://nftikets.gitbook.io/untitled/user-guide/how-to-sign-up-on-nftikets.md?ask=
```
The question should be specific, self-contained, and written in natural language.
The response will contain a direct answer to the question and relevant excerpts and sources from the documentation.
Use this mechanism when the answer is not explicitly present in the current page, you need clarification or additional context, or you want to retrieve related documentation sections.